
LUMIX S1RII Review – 8K is Here, But at What Cost?
LUMIX S1RII Review – 8K is Here, But at What Cost?
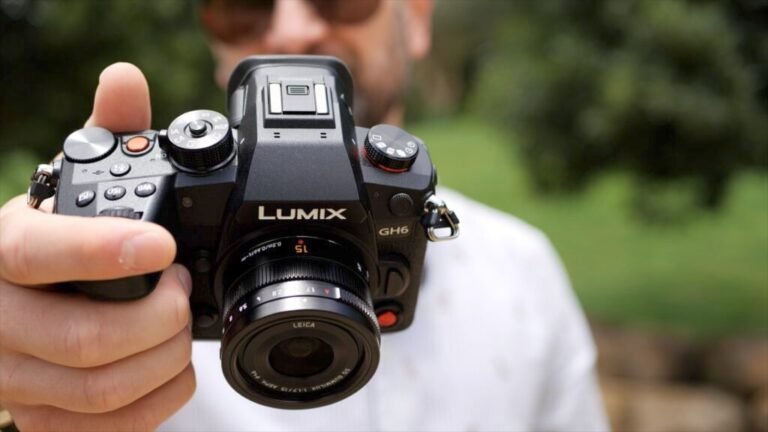
In today’s article, we check out the new flagship hybrid mirrorless camera from Panasonic – The LUMIX S1RII. Consider this not only an upgrade to the original S1R but an upgrade to the S5II and X. The S1R Mark II has a new 44.3-megapixel full-frame sensor and a killer feature set which includes 8.1k internal recording, 32-bit float audio support, active cooling, uncropped 4K 60p and 6K 60p – all, with full autofocus support.
The LUMIX S1RII has Raw Internal Recording, LUMIX lab support, and YES! We finally have a full-frame Lumix camera that can shoot 4K120p – This new camera also has the best fully articulating screen I have ever used – Let’s get into it.
Price & New High-Resolution Hybrid
Welcome back, folks; my name’s Shane – In today’s article, we are checking out the LUMIX S1RII. The launch price of this camera is 5499 dollars in Australia (Amazon Link), $3299 in the US (B&H Link), and 3649 in Euros (Amazon Link) – As I mentioned in the intro, this is a beast of a hybrid camera – It has essentially everything we’ve seen in previous cameras like the S5IIX, GH7, and G9II, and some new features we haven’t seen on any other model. There are also some compromises with this camera, which we’ll discuss in this article and video review below.
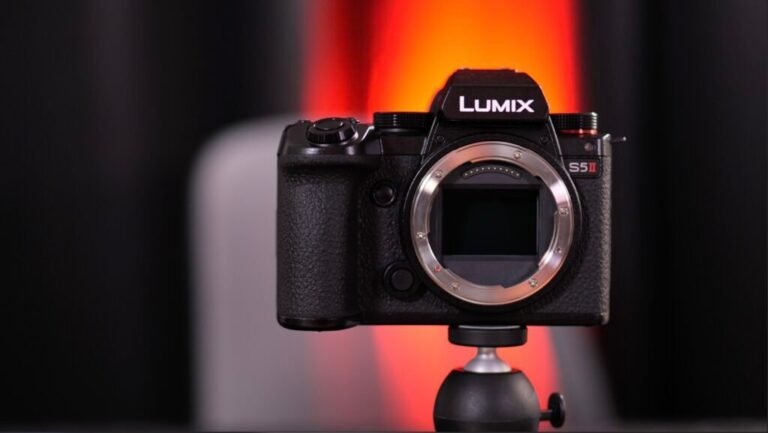
While the name suggests this is a replacement for the original S1R only, it’s more of a standalone high-resolution hybrid camera that excels at both professional photography and higher-resolution video work. If you’re upgrading from the S1R, this makes sense. If you’re looking for a higher-resolution video option from the S5II or X—or even the S1H—the LUMIX S1RII might fit the bill, depending on your shooting scenario.
I’ve been testing this camera’s video and photographic performance in Australia in the summer. I’ve shot with it on a tripod, on a gimbal, and stationary on a tripod. Throughout the article, we’ll discuss the pros and cons of using this camera in real-world scenarios, not just in a studio environment, because I have much to say about it.
Disclaimer and Notifications
Before we get into it, here is a quick disclaimer: Panasonic does not sponsor my video or review; the camera is just on loan. I didn’t accept any gifts, and the LUMIX S1RII camera is already on the way back to Panasonic.
My LUMIX S1RII Video Review
If you prefer to watch my review, check it out here.
Firmware:
Also, note that this is on pre-release firmware, but it’s close to final, so everything I will cover in this article should be accurate to the release of this camera in March this year. A new firmware update in 2025 will offer 81k and 7.2k open-gate recording options, giving you a massive amount of pixels to work with in post-production. I’ve tested a few firmware versions before putting this final review together, and the few bugs I noticed on earlier versions are fixed with this current version.
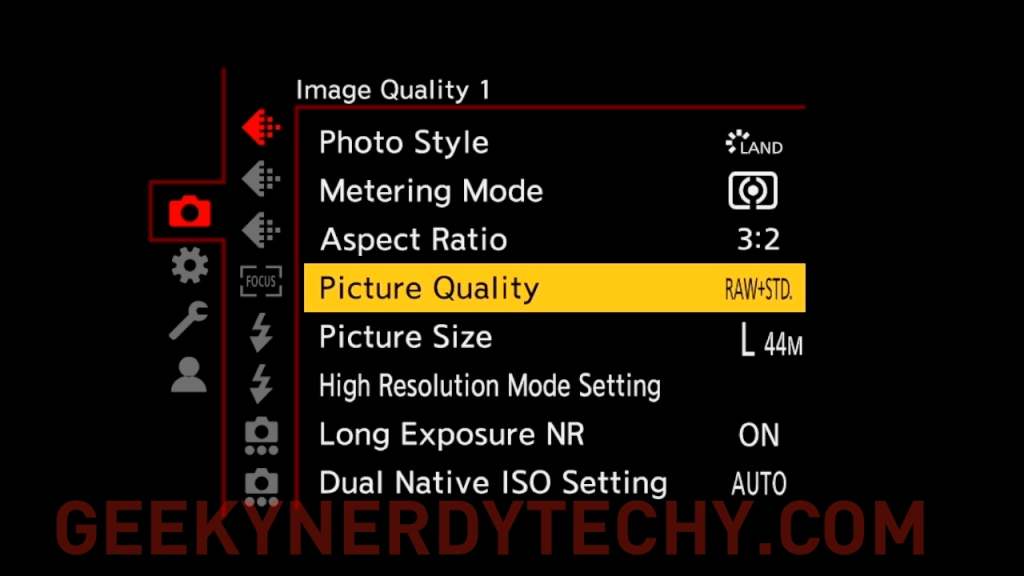
Sensor & Dynamic Range Expansion
Let’s cover the sensor and dynamic range. The LUMIX S1RII is loaded with a new 44.3-megapixel sensor capable of 14+ stops of dynamic range when shooting VLOGs. The cameras can shoot up to 8.1k video at 30p or 25p if you’re in the PAL Region with a 17×9 aspect ratio. If you’re a photographer, the handheld high-resolution moModeill outputs a whopping 177-megapixel image, which is crazy.
The S1R Mark II also features a new “Dynamic Range Expansion” video mode, which increases the dynamic range by about a stop when shooting in VLOG. It increases from 13+ stops with it off to 14+ stops with it on.

LUMIX S1RII Rolling Shutter Performance
While Dynamic Range Expansion increases the dynamic range by about a stop, it also, unfortunately – increases the rolling shutter. Panasonic suggested that this new feature is best used in good lighting conditions rather than in low light scenarios, which they recommend just leaving off. Looking at a side-by-side comparison, I can’t see a difference between the eyeball test and the waveform. The main difference is how the scene is exposed, and the DRE mode looks brighter. Once corrected, they both look pretty much the same on the timeline.
My only gripe with this new mode is that the camera menu will grey out the remaining recording modes, so you can select a different mode from the menu without turning DRE off. There are two potential fixes: just let you switch modes with a quick onscreen notification letting you know DRE is off, or add a new sorting option in the menu for modes that support it. The quick fix is just mapping a button or a menu option to the Q menu to turn this feature on and off. I didn’t notice any major difference in the image quality with this on, so you’re not missing out on much with it off in my real-world tests.
Another nice addition is that the sensor curtain can be closed in the menu, which helps prevent dust from getting on the sensor when shooting outdoors. The new shutter curtain mode is a huge help if you’re outside shooting wildlife or need to change a lens.
Hybrid Zoom Improvements
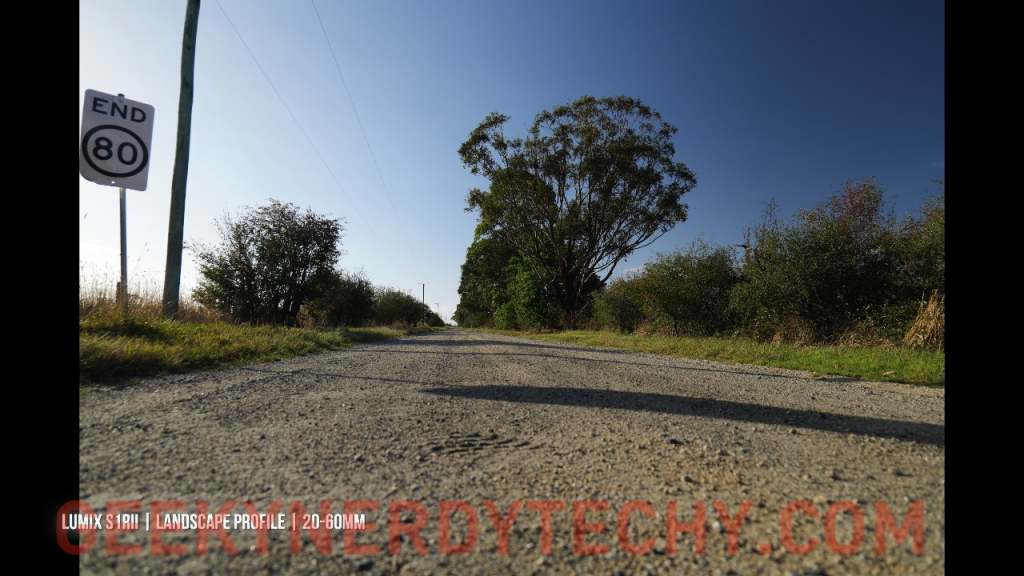
Another benefit to the new high-resolution sensor is that Hybrid zoom and crop zoom can now punch in like crazy. I tested Hybrid Zoom shooting 4k, and the reach with my 20-60mm kit lens was crazy, reaching 125mm on the tight end. If you want to use hybrid zoom in HD, the kit lens can punch into 251mm, which is insane. While the reach is insane, there’s quite a drop in quality when shooting in HD – and 4K is the sweet spot for the Hybrid Zoom Feature. Hybrid zoom is one of my favorite features for travel work because you can pack one lens and get way more reach out of it.
Crop Zoom
If you’re shooting with a Prime lens, give “crop zoom” a shot – Crop zoom is kind of similar to how Hybrid Zoom works, but for prime lenses – you can set up a zoom amount and use the d-pad on the camera to zoom in and out with primes. When shooting in 4K with a 50mm prime, I can zoom between 50mm and 104mm, doubling my focal length, and in HD 1080p, the reach goes to 209mm! Crop Zoom is pretty wild, and If you want to access this feature easily, you can map this feature to a custom button on the camera. Again, you can crop far more than on a 25mp sensor because of the sensor resolution. (See the video above for details)
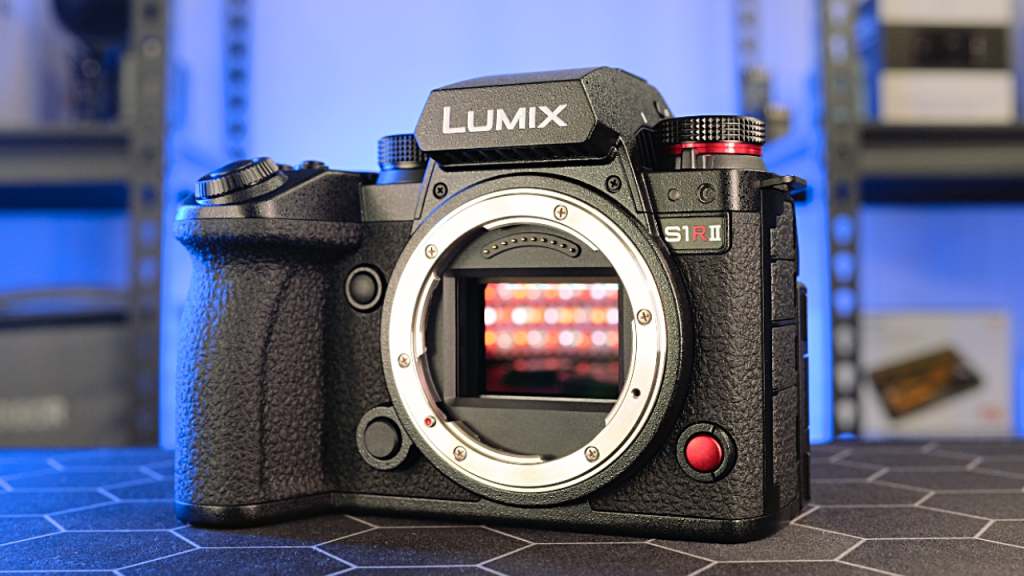
Body Design, Buttons, and Dials.
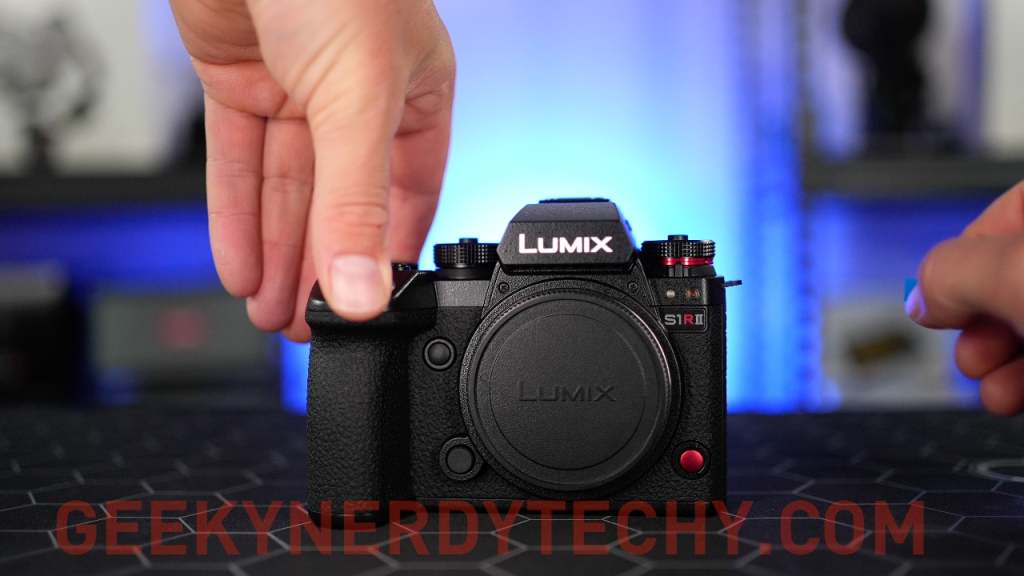
The body design on this new camera body is awesome. It only weighs 795 grams, 59 grams heavier than the S5IIX and about 21% less than the original S1R, which was just over 1kg. The grip feels like an S5IIX in the hand, and the White Balance, ISO, and Exposure compensation buttons are in the same spot. If you like to shoot in the elements, this camera is weatherproof and operates from -10c to +40c.
We get a nice red record button on the front of the camera, which is great for shooting video, along with the regular red record button on the top. Much like the G9II, there is no dedicated audio button on this camera—you can map this to one of the buttons or the front on the back of the LUMIX S1RII if you need it.
The wheel near the shutter feels like the S5IIX as the rear thumb wheel. Some people had issues with the placement of the rear wheel and how easy it was to knock on the S5II and X accidentally – I never found this to be an issue personally, but thanks to the lever on the back left, you can lock your settings once you’re rolling – this level is pretty wild as it disables the main wheels, dials, screen, Dpad, and Joystick from modifying any of your settings while shooting. There’s a custom function button on the front, a remote port on the top right, and a pair of microphones on the top.
Battery & Power
The camera uses the same DMW BLK22 battery found in all modern Lumix cameras since the S5, which is great if you’re already rocking an S5, S5II, or GH7.
USB-C PD power is available via the USB-C port, and if you want to record externally, this camera will also work with dummy batteries. I initially thought this might be the first LUMIX camera to have two USB-C ports, one for Power Delivery and one for recording externally to SSD.
Main Command Dials
The body has a new three-mode control level on the left, which allows you to easily set the camera in Photo, Video, and S&Q Mode. Switching modes between photo and video changes the camera’s menu system. Because of the separation in the shooting modes, this menu feels much easier to manage.

Like the prior cameras, the S1RII suffers from the same bug where the video mode resolution can affect the S&Q resolution. For example, you’re shooting 4k in the regular movie mode. When I switch the S&Q mode to HD120p, the movie mode will switch to HD. This glitch caught me off guard several times on the S5II and X, and it’s a shame to see this has not been fixed yet. You can set up the custom modes to your favorite settings, and the camera will recall them, but it’s worth mentioning.
This command dial does not have a “Movie” mode. However, it has the regular P, S, A, and M modes and five custom modes mapped from C1 to C5. The benefit of this new setup is that you can set up to 5 unique photo settings, switch to video, and set 5 different modes, and the same with S&Q.
While this took a day or two to get used to, I love this setup. You can also store a bunch of additional custom modes within the camera menu and recall them if need be. This setup completely changes your workflow, and if you like to shoot in different aspect ratios, modes, profiles, frame rates, or resolutions, it’s a great addition.
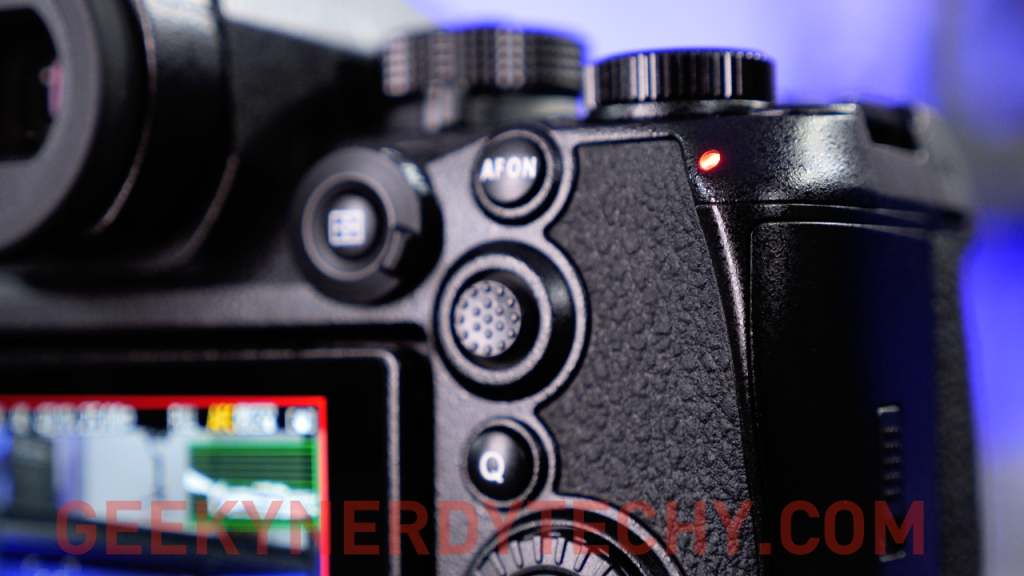
Tally Lamps
There are red tally lamps on the front and back of the camera, so you know exactly when you’re recording—whether you’re the talent in front of the camera or the talentless like me—haha. You know exactly when you’re recording. After having tally lights on a camera, it’s hard to go back, and I hope all future cameras from LUMIX have tally lamps. As always, you can adjust the brightness of the lights or turn them off if you prefer.
Displays:
We get a nice high resolution of 5.76 million dot EVF—while this is the same resolution as the S1R, it’s a nice bump in resolution from the S5II, which has a 3.68 million dot EVF. You can set the EVF’s refresh rate to 60 or 120 frames per second. The two downgrades over the S1R are that the top LCD screen is missing from the original S1R and has a slightly lower resolution.
Screens
We get the best implementation of the fully articulating touch screen I have used. This screen can flip out like most fully articulating screens. You can use it in selfie mode like this: flip it back and have it centered for video work, or if you’re shooting photos at an event or tricky situation, flip it out again like this and spin the screen around however you like.

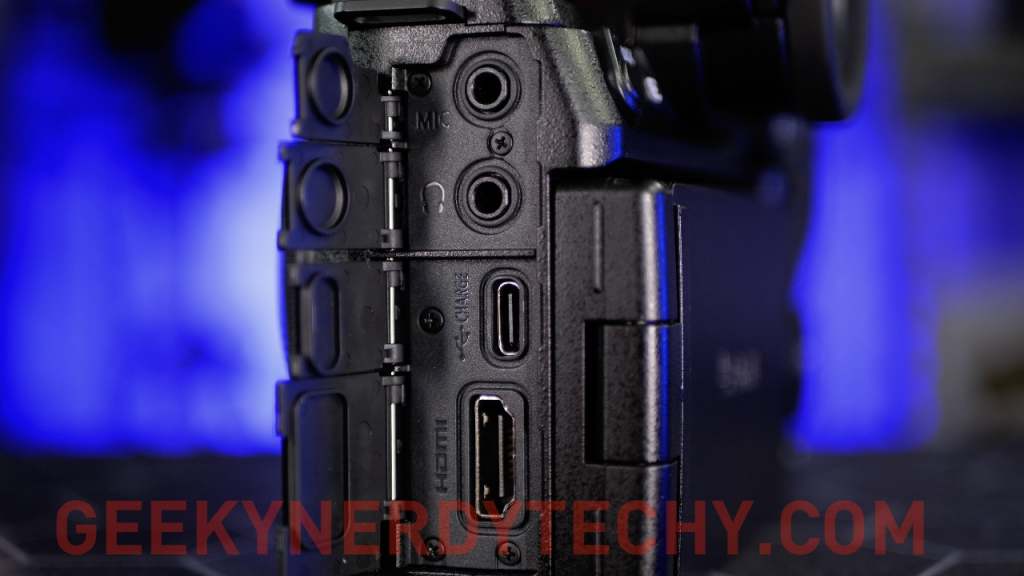
I love that the screen does not get in the way of the USB-C and Full Size HDMI port on the side, so if you use this in a studio setup like this, it won’t be an issue. I haven’t tested another camera with this sort of screen, and I found it a pleasure to use when shooting video because I can set it up for a more ergonomic experience. While I don’t use an EVF as much as I used to, this new EVF is a pleasure to use, whether you’re shooting video or photos or menu diving.
LUMIX S1RII Media Cards
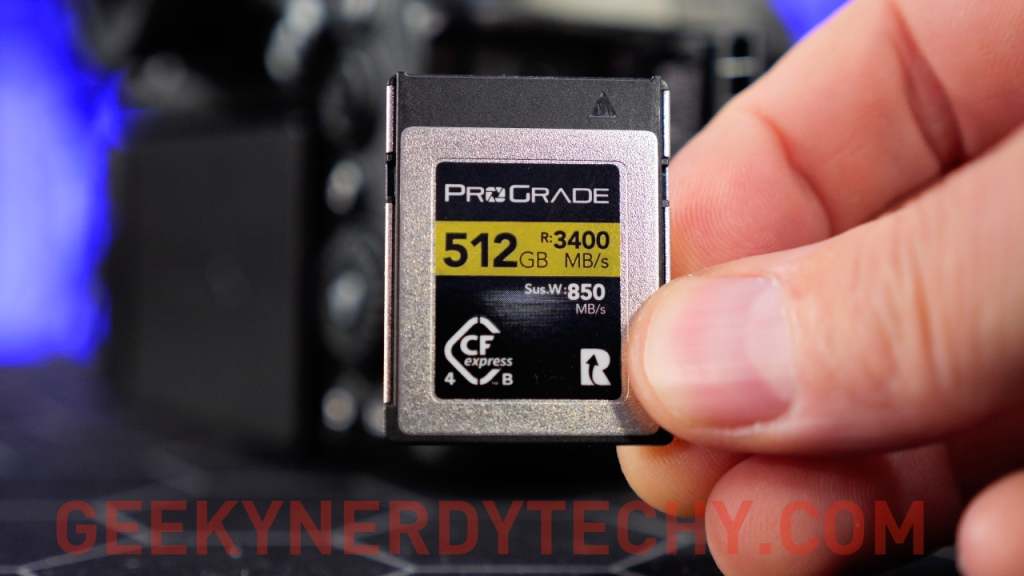
The S1RII has dual media card bays—we get a CFExpress Type B card slot and a UHSII SD card slot next to it. While the CFExpress card allows you to shoot ProRes Raw Internally, you can shoot 8.1K 4:2:0 10-bit with no problems with the SD card slot. I tested all the modes using a V90 SD card, and my ProGrade CFExpress card had no issues recording raw internally.
Like many recent Lumix cameras, you can record to SSD via the USB-C port on the side. While some CFExpress cards can be pretty expensive, they are so fast that you can transfer 100 GB of files in a fraction of the time with an SD card. Check out my recommended cards below on B&H (Affiliate Links)
🛒 V90 SD Card – https://bhpho.to/44Zj2wI 🛒 CFExpess Type B Card – https://bhpho.to/435D6hY
LUMIX S1RII Movie Modes RAW & PRORES
The S1RII has the most recording modes I have ever seen on a camera. If you can’t find something you like on this, you’re doing something wrong! Haha. We get three main lists of codecs, including MP4, MOV, and Apple Pro Res. If you want to shoot 5.8k RAW, you can find that at the top of the list. This RAW recording is a pixel-to-pixel readout because the sensor is much larger than the 5.7k aspect ratio. The image quality shooting in RAW is unreal – it has such a nice film look. This mode is a true 5.7k Raw Recording – don’t the pixel-to-pixel mode confuse you here.

The benefit of Raw is that you can fully adjust the white balance and exposure in post-production, making it easy to change any errors when shooting. Shooting RAW will quickly fill up a 512 GB CFExpress Card, so ensure you get an External SSD for longer recordings. I had no issues working with RAW in the final cut, but I understand that Davinci Resolve does not support it. While I don’t use Davinci for Final Cut, it’s fine. There are a bunch of Apple ProRes formats, from HD up to 5.8K 422HQ, which use a lot less data on your card. ApplePro Res and RAW can only record to the CFExpress Card Slot or External SSD except for a few HD modes.
LUMIX S1RII Movie Modes
The MOV menu has seven pages of recording quality options, ranging from 1080p 8-bit 25p to 8.1k 4:2:0 10-bit with a 17×9 aspect ratio. I am a big fan of the 5.9k 50p setting. It strikes a great balance between resolution and file size, which is great for post-production. This may be the best thing about the S1RII from my perspective.
Being able to shoot at 5.9k 50p uncropped is killer. I shot a bunch of footage for my friend Herbie, a natural bodybuilder, and I could crop in on this on a 4K timeline and slow it down 50% without worrying about APS-C crops or anything ruining my result. Unless I shoot a short film or documentary, I shoot in 16×9, and this 5.9k model is the perfect choice. There are plenty of resolutions if you prefer to shoot with a DCI or 17×9 aspect ratio.
As I mentioned, a firmware update for the S1RII will give it both 8.1 and 7.1k open gate. The highest open gate resolution is 6.4k, which is found in the MOV menu. While there’s a 7.7 K 50 and 60p option, it comes with an APS-C crop. Also, this new camera doesn’t have the Mp4 Lite option in the menu like the rest of the current lineup, so whether we see that in the future is yet to be seen.
Dual Native ISO & Low Light
Dual Native iso is different depending on your shooting mode. For example, in Standard, Natural, or Vivid, the Low Base is 80, and the High is 400. If you are in the CineLike profiles, it changes to 160 and 800. When shooting VLOG without the Dynamic Range Expansion, it’s on the low end and 2500 on the high, and with DRE on, it’s listed as 400 and 2000. When shooting RAW or JPEG, it is 80 on the low side and 400 on the High.
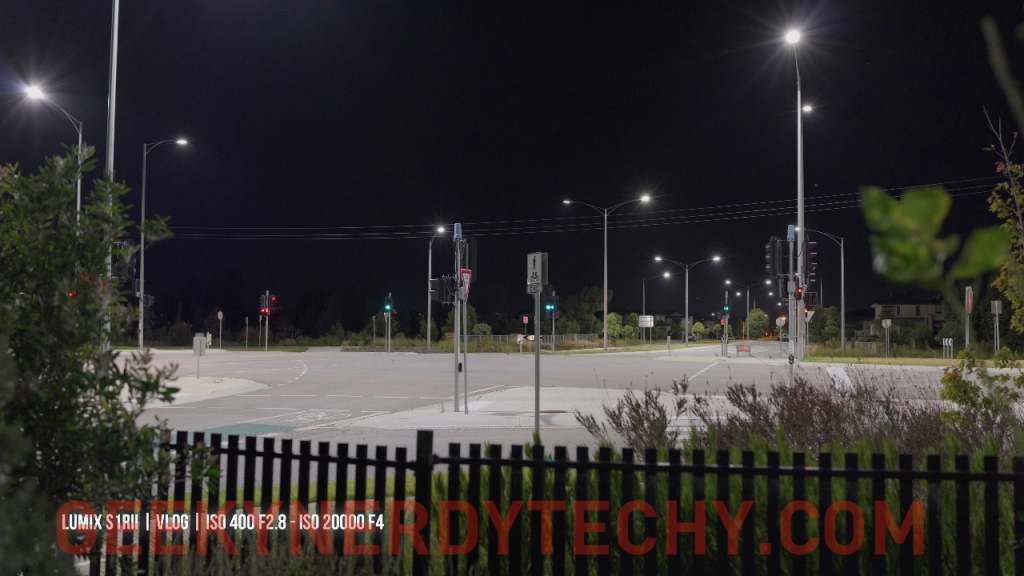
The Dual ISO is somewhat complicated, so I suggest writing a cheat sheet. The advantage of a Dual Native ISO is that the image will be clean at the high ISO. I found the overall low-light performance usable to at least ISO 20000!
LUMIX S1RII S&Q Modes & High Frame Rates & S&Q Autofocus
Let’s get into S&Q modes and higher because there are things to know about this camera. While the S1RII can shoot 4K 120p, it does with about a 1.1x crop. The crop is similar to the Sony FX3 or A7SIII in this mode. If you’re in S&Q mo, de loses tracking modes and PDAF. I tested the DFD Autofocus performance on this mode and was surprised by how well it worked. It’s more confident than I’ve used on other cameras, but it’s disappointing not to see PDAF enabled in this mod.e
On a positive note, 4K60p in S&Q both have Phase Hybrid autofocus—without a crop and full tracking, which is great. I hope LUMIX can also add 4K50p to the S&Q modes on their cameras in 2025—it would be a great addition for people living in the PAL regions. You can also shoot up to 1080p at 100 frames per second with PDAF. 120p looks like it’s back to DFD, so it’s the same as the LUMIX S9’s functionality.
Interestingly, if we switch to 4K100 or 120p in the main recording quality menu, PDAF works if you select the Pixel to Pixel Mode—while this might not be ideal, and your field of view changes, it might be enough to get you by. Again, most of the Slow-Motion clips in my video were shot using 4K100p with DFD, and as long as the subject isn’t facing you, it does a good job, and I would trust it enough for most situations.
The S&Q Mode on the S1RII is also disappointingly capped at 120p in both HD and 4K modes. However, there are also options for 1080p at 150 or 180, as we saw on the S9 or S5II and X. This kind of hints that some of these features might end up on another camera at some point in the future.
While the S&Q modes are limited – the footage looks beautiful, and having uncropped S&Q is a nice upgrade over the older cameras.
Video Autofocus:
Regarding autofocus for video, we have all the same modes we’ve seen in recent Lumix releases, including human, animal, car, motorcycle, and plane tracking. The new AF aligns this with the rest of the current cameras. When I first got my hands on this camera, it was nowhere near as reliable as the final firmware, so expect the same great AF performance we’ve seen in other recent cameras like the S9 or GH7. Human detection works great, and after testing this final firmware, I have no problems recommending it for video shooters.
Unlike the S5II & X, which had some odd limitations with PDAF, you can now shoot in all the full-area camera modes with full PDAF, except for the 4K120P options, as mentioned earlier. For 4K120 PDAF, you need to be in the Pixel to Pixel mode in the regular movie mode if you skipped ahead to this section.
There is a new tracking mode. You can select a subject, and a tracking box will appear on the screen. You can move it around wherever you like. Once the subject enters the box, the tracking starts. I tested this out with the vehicle detection mode on, and it worked fine.
Tools
One of the new features that panasonic added to the video is false color. False color lets you see your exposure on screen with a color guide to help find 18% middle grey, which is indicated in green. Here’s Here’ss would look in the studio here for my talking headshot. There’s a handy color chart built into this menu option, which indicates different exposure levels. The other filmmaker tools include vectorscope, waveform, shutter angle, the red recording ring on the screen, spot metering – and everything else. If something is missing between this and the S5IIX, I haven’t haven’t.
LUMIX S1RII Active IS/IBIS Performance
One of my favorite things about the new S1RII is that video IBIS performance offers slightly better performance than the S5IIX. There’s a stabilization mode called cropless, which gives you the benefits of e-stabilization without a crop. This is because the sensor has room to position the full-resolution recorded image in an area smaller than the crop enabled. If you need even more stabilization, you can run the camera in standard and high modes that crop. Standard is all you’ll need, and High is great if you run with the camera. With e-stabilization, there’s a difference in the result between the regular standard and high moModeersus, which is something like the S5II.
LUMIX S1RII Color Science
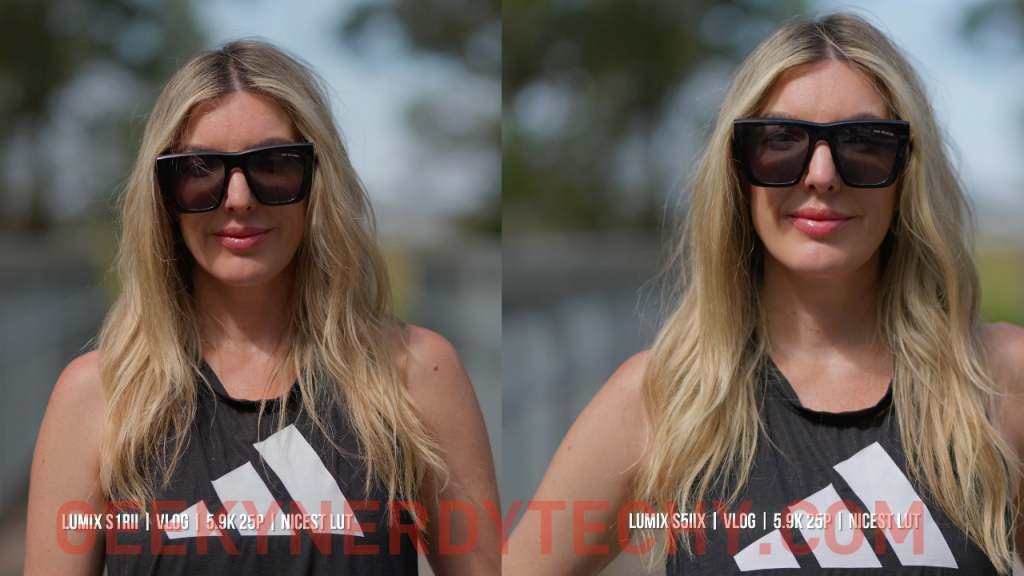
The color science is similar to the S5II and X; minor color differences are easily adjusted in post-production. Looking at a side-by-side, it’s so it’s – there might be more saturation in the S1RII footage when shooting in VLOG, but it’s minimal. This is not a clinical test, but I applied the same color grading to both clips, and there’s a slight difference. Shooting with the regular profiles, I noticed that the S1R looked slightly hotter in the magenta than the S5IIX.
LUMIX S1RII Introduces a New Picture Profile called Cinelike A2
The new Cinelike A2 Profile might be my new favorite straight-out-of-camera profile for getting a cinematic color grading without doing anything in post-production. The new profile looks amazing on this camera, and I hope we see this on some of the other cameras in the lineup with a new firmware update. A
ll of these sample shots at the gym are ungraded and look awesome. The skin tones look amazing, and the color and contrast are what I would grade a shoot for this particular shoot. The rest of the standard profiles, including Natural, Portrait, Standard, Leica Monochrome, and real-time LUT support via the app, are built-in.
There was no mention of this camera before filming my video about AARI log support. If it’s not announced after release and you need it, hold off for whatever is potentially coming next. I get a feeling the omissions from this release for video might mean there’s something out in the works from LUMIX that offers more robust video features without the issues with overheating and rolling shutter.

Photography Autofocus
While I had a mixed experience with autofocus, it did a great job tracking subjects in photography. I wanted to test the performance with Rhyannon zig-zagging towards the camera with a fast run, and the hit rate was excellent. This was all shot using the Human Detection Autofocus mode, which has a high hit rate. (see the video in this post for examples).
I also shot many general animal shots with this camera, and the tracking and performance were solid. While I haven’t used this for sports or wildlife, I was impressed with the hit rate. Animal AF is also great. After a swim, a dog came out of the lake, and the Animal detection worked flawlessly.
Constant Preview is now fixed. This means it’s now possible to maintain the exposure preview with AF ON while shooting in manual mode. Constant Preview also works when a flash is attached. A new option in the camera called “Constant Preview “during AF Operation,” where you can toggle this on or off.
LUMIX S1RII Photo Modes
This camera has the S1R name, so it’s no surprise it’s great for photography. The 44mp sensor is capable of producing beautiful images. While I am mostly a video shooter, I can appreciate the level of detail on this higher-megapixel sensor over the S5II. I noticed it immediately when I viewed the files on a 4K or 5K display. The Handheld high-resolution Mode is fantastic on this camera, producing a massive 177mega pixel image. If this is too big, you can drop the settings down in the menu – stay tuned for my free S1RII walkthrough video covering these types of features.
The burst photography modes on this camera are insane. It offers up to 40 frames per second blackout-free when using the electronic shutter, up to 10 frames per second even over the S5IIX. You can expect 10 frames per second in mechanical shutter mode with continuous shooting. Thanks to its beautiful detail, I can see this camera used for studio portraits, photojournalism, or high-resolution landscape photography.
The S1RII is also equipped with pre-burst, offering a choice of 0.5, 1, or 1.5 seconds of pre-capture when the shutter button is half-pressed. This can be invaluable for wildlife or sports photographers.
Audio
The S1RII is compatible with the new DMW-XLR2 adapter, which allows you to record 32-bit float internally like the GH7. This also works fine with the DMW-XLR1, so if you are still rocking that from the days of the GH5, it’ll XLR audio into the camera. Unlike the S5II and X, this camera does not record four audio channels in MOV mode, so annoying audio issues are no longer a problem.
Like prior cameras, you can drop the input level from normal to low or change the 3.5mm input from Mic to Line level. I’ve tried a 3.5mm input socket with a range of wireless mics, and it’s been in my testing – My suggestion is always to keep the camera gain as low as possible, and you’ll get clean audio quality. Internal four-channel audio is supported if you use the two XLR adapters.
LUMIX S1RII Overheating / Runtime / Performance
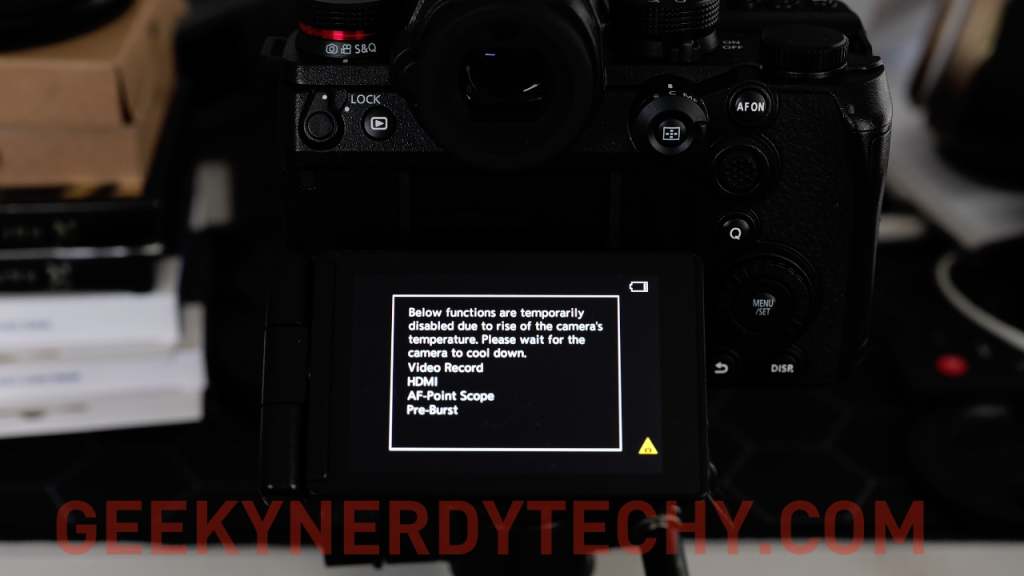
While this camera has active cooling, it can still overheat quite easily. This has to be my biggest nitpick with the S1RII over the S5IIX or GH7. While it is summer here, it was overheating sooner than expected—within about a 15-minute window outdoors. The performance was much better indoors, but I can’t recommend the S1RII over the S5II, X, or GH7 for hot locations.
If you are predominantly just shooting photos, the performance is fine for indoor and outdoor environments, but this camera eventually overheats when it comes to video. It overheated 3 or 4 times while shooting the samples with Rhyannon on the bridge. The GH7 we used to shoot the Behind the Scenes stuff worked non-stop, and I was shooting with that at 5.7k. While it was 34C outside (or 93f), the camera was getting hit by direct sunlight, and it was no doubt well above 40C internally, given the grip was as hot as it was. Again, I was only shooting 10-20 second clips and a time, changing modes, and doing it – and it still overheated.
The only way I could mitigate the overheating was by cranking the camera’s fan to high, and while it helped, it drained the battery way too fast for my liking.
Panasonic mentioned in our discussions that the S1RII is not the sort of camera that will record forever, like the S5II and X, and I can absolutely vouch for this. Oddly, it can overheat as easily as it does, even with active cooling. I ran some tests indoors in the studio, which was about 23c on the day of filming, and while the camera got hot inside, it did a lot better.
Shooting 8K 10-bit 4:2:0 on the S1RII to the CFExpress Type B Card, the overheating warning message came up around the 31-minute mark. It continued to record for a total of 58.33 before shutting down. I felt around the body of the camera, which was very warm. I had also burned through 3/4 of a fully charged battery. The fan was set to mode two, and if I put my ear up to the camera, the fan was working hard. The back of the body was quite hot, and even with the flip-out screen away from the body, it was very hot internally.
After letting the camera cool down for about 20 minutes, I ran a second-second test on the S1RII set to 4K50p 4:2:2 10-bit, and sadly, the camera overheated again at the 34-minute mark. I thought the performance in 4K would be better than this – other cameras like the FX3 and A7SIII don’t overheat shooting either 4K50 or 60p, and the A7SIII has no fan.
I waited about 20 minutes and started the test again, shooting 4k 50p to the SD card instead of the quite hot CFExpress Type B Card. This time, the recording increased to 1 hour and 14 minutes before the camera overheated. The battery was also about to die, so I think shooting 4k50p will get you a maximum runtime of around 1 hour and 20 minutes.
I ran a final thermal test shooting 4K120p in S&Q mode with the timeline framerate set to 25p. This S1R S&Q mode in the camera slows the footage down internally without audio. I also put the camera’s internal fan too high for the last test shoot of the CFExpress Type B Card. It was recorded continuously for 45 minutes. This translates to 4.8x more footage than the length of the clip, so it is just over 3.6 hours.

I love the image quality, but I won’t use this camera for video work. Many of the places I frequent get hotter than where I live, and it’s not reliable enough for what I do. This high-resolution sensor must generate more heat than the S5II. If you are shooting video in colder climates – or even in winter here, it would no doubt perform better than in my tests – And these real-world tests are valid for folks in warm or mixed climates.
HDMI Output
The HDMI output is finally fixed – it can now mirror both the screen on the external display like the GH5, GH6, and G7 can. LUMIX removed this from recent releases, and it’s a feature miss not having on the S5II and X – if you shoot in a studio environment and want to see the camera output on both the touchscreen and HDMI output, this makes a lot of sense.
Interestingly, when connected to HDMI, the Body Detection modes go missing once you reach higher resolutions. If you plan on shooting 8k with all the autofocus detection modes while using an external monitor, this isn’t for you.
Power Round
Let’s do a Let’s Power round and cover a few additional features of this camera. The S1RII can support live streaming to destinations like YouTube and Facebook. This camera is also compatible with Adobe Frame.IO for wireless file transfer – this works with Proxy files, JPEG, and RAW photos. In the box, we get the camera, a battery pack, charger, body cap, hot shoe cover, and a cover for the Battery Grip connector on the bottom. There’s no There’socket included, so you’ll need to provide your USB wall charger.
App Support
The S1RII is compatible with the LUMIX Lab app, which allows you to create and transfer custom LUTS to your camera. Real-time LUT has been one of my favorite features since the S9, and I am glad it’s made to the S1RII. You can overlay two LUTs at a time, save up to 39 internally, and it supports both VLT and CUBE files.
There’s also a tool called LUMIX Flow, which helps you create scripts, storyboards, and shot lists for folks working on set. You can select between a few different genre presets, such as music videos, documentaries, or dramas, or sketch out scenes to help you visualize shot angles and actor positions.

Remote Monitor
Once the camera is connected, you can use the phone as an external monitor and rate your takes as ones to keep or disregard. If you’ve ever worked with storyboards before, you’ll understand how important it is to visualize your shots ahead of time. I would love to see this as a desktop app that can pair with the mobile app. I find it much easier to work on a computer than on a phone, but I like the direction this app is heading. I haven’t had time to test it properly yet, but if you want to know more about it, just let me know in the comments on YouTube.
Wrap Up
Let’s wrap this article up and discuss the pros and cons. First, the image coming off this sensor is sensational! The 8K image quality is ridiculous, and punching in so far on a 4K timeline without losing resolution is fantastic. The dynamic range, color science, and new Cinelike A2 profiles are killer. The Cinelike A2 is my new favorite profile, and I hope it makes its way to other cameras in the lineup.
What I like about the LUMIX S1RII
Autofocus, flip-out screen, and IBIS system are all great, and if you’re a photographer – you’ll love it. I am very impressed with the layout of the buttons, the new menu system, and the cropless 4K50 and 60p recording make this a solid option if you don’t need it to run indefinitely. We get the same great video tools and features we’ve seen on other Lumix cameras until now. The photography burst rates are enormous, with an excellent hit rate even in challenging situations where someone is running at the camera trying to trick it.
LUMIX S1RII Nitpicks
Some of my minor nitpicks are that I wish Lumix would fix the bug where you switch resolutions in S&Q, and it shouldn’t be video mode. This bug needs to be fixed through firmware at some point; it’s driving people up the wall. Secondly, the battery life is pretty average at best, and even the GH7 we let roll in the background had 4 out of 5 bars full, while the S1R II only had 2 of 5 left. If you buy this camera, pack a few extra batteries.
The only other nitpick with the S1RII is that it can only shoot up to 120 frames per second in S&Q mode. Unless I missed something in the menu, there are no higher frame rates, even in 1080p.
4K 120 in S&Q looks great, but you’re back to DFD Autofocusocus. This depth from defocus autofocus might be my only other nitpick. The DFD modes have to go at some point, and I thought this might be the first full-frame line to have PDAF in all modes, but it’s not there yet.
LUMIX S1RII Overheating – The Biggest Deal-Breaker
The overheating is the biggest deal-breaker for me – but that’s just that’s – your situation may vary. Where I live, it can get hot, and if you know the channel, I post videos from interstate and overseas in hotter and more humid conditions than here, so I won’t be buying on this. The marketing around this camera ahead of launch was that this is the new “Photo Video”High-Resolution Hybrid” and not just an update to the S1R – and it is. It kills almost everything regarding video features but is let down by substandard cooling for these higher-resolution modes. If you plan on powering this via USB-C or HDMI, it could heat up even faster.
Final Thoughts on the LUMIX S1RII
If you’re a professional video shooter who needs reliability for long-form video, stick with your S5II or X until whatever comes next. This is an important camera for photographs and hybrid shooters who want excellent video quality, but it won’t be for won’t be for everyone. Again, this is the best image I’ve seen. En I have a Lumix full-frame came. It’s amazing; you’ll love it if you can work within its video limitations!
Panasonic LUMIX S1RII Specifications
Below is a comprehensive table listing the specifications for the Panasonic LUMIX S1RII (DC-S1RM2) full-frame mirrorless camera. Note that some details may be subject to future firmware updates, as indicated by Panasonic.
| Category | Specification |
|---|---|
| Sensor | 44.3MP Full-Frame BSI CMOS Sensor |
| High-Resolution Mode | Up to ~177MP (handheld or tripod, in-camera processing) |
| Processor | High-performance engine with L² Technology |
| ISO Range | Normal: ISO 80–51200; Dual Native ISO for different color profiles |
| Image Stabilization | 8.0-stop In-Body Image Stabilization (IBIS); 7.0-stop with Dual I.S. 2 (telephoto) |
| Autofocus System | 779-point Phase Hybrid AF with AI-powered subject recognition (humans, animals, vehicles) |
| Subject Detection | Humans, animals (including birds), cars, motorcycles, bicycles, trains, airplanes; Eye detection (default for humans, optional for animals) |
| Continuous Shooting | Electronic Shutter: Up to 40 fps (12-bit RAW); Mechanical Shutter: Up to 10 fps (fixed focus), 8 fps (C-AF); 9 fps for 14-bit RAW |
| Buffer | ~70 frames (with CFexpress Type B card) |
| Video Resolutions | – 8K 30p/25p/24p (17:9, 8128 x 4288, 10-bit) – 6.4K 30p (3:2, Open Gate) – 5.8K 60p/30p/24p (17:9, pixel-to-pixel, slight crop) – 4K 120p/100p (16:9, full-frame, subsampled) – 4.7K 60p/50p/48p/30p/25p/24p (4:3) – C4K/4K UHD (APS-C mode available) |
| Video Codecs | H.264/MPEG-4 AVC, H.265/HEVC, Apple ProRes, Apple ProRes RAW (5.8K internal to CFexpress Type B) |
| Dynamic Range | Up to 14 stops (with Dynamic Range Expansion in V-Log); 13 stops standard V-Log |
| Color Profiles | V-Log, Cinelike A2 (neutral, film-like), Cinelike D2 (low contrast), Cinelike V2 (high contrast); Real Time LUT (up to 39 LUTs) |
| Future Firmware Updates | – 8.1K/7.2K Open Gate recording (2025) – ARRI LogC3 (with DMW-SFU3A key) – RAW HDMI output (8.1K/7.2K to Atomos/Blackmagic) – HEIF 4:2:0 10-bit recording – Multiple frame markers (up to 17) – Bluetooth DJI gimbal connectivity |
| Video Features | False Color, waveform, zebras, proxy recording, cropless E.I.S. (with Lumix L-mount lenses), 32-bit float audio (with DMW-XLR2 adaptor, sold separately) |
| Viewfinder | OLED EVF, ~5.76M dots, high-resolution |
| Rear Monitor | Tilt and free-angle LCD, high-resolution |
| Storage | Dual slots: CFexpress、周2.0 CFexpress Type B, SD/SDHC/SDXC (UHS-II) |
| External Recording | USB-C SSD recording, HDMI RAW output (future update) |
| Ports | USB-C (charging, data, tethering), full-size HDMI, 3.5mm mic/headphone jacks |
| Battery | DMW-BLK22 Lithium-Ion (7.2V, 2200mAh); Optional DMW-BG2 battery grip |
| Build | Magnesium alloy, dust/splash/freeze-resistant (-10°C to 40°C) |
| Weight | ~796g (body only) |
| Dimensions | Compact design (smaller than original S1R) |
| Cooling System | Internal fan (silent, with Standard/High thermal management settings) |
| Connectivity | Frame.io, Capture One tethering, LUMIX Lab app (LUTs), LUMIX Flow app (video workflow, external monitor via USB-C) |
| Price | $3,299.99 (body-only, US) |
| Availability | Late March 2025 |
| Additional Features | – Crop Zoom/Hybrid Zoom – Pre-burst mode – Front tally light – Dedicated photo/video/S&Q switch – Operation Lock lever – Individual port doors |